Diagrama de temas
-
-
Foro
-
-
-
BLINK PARPADEO DE UN LED
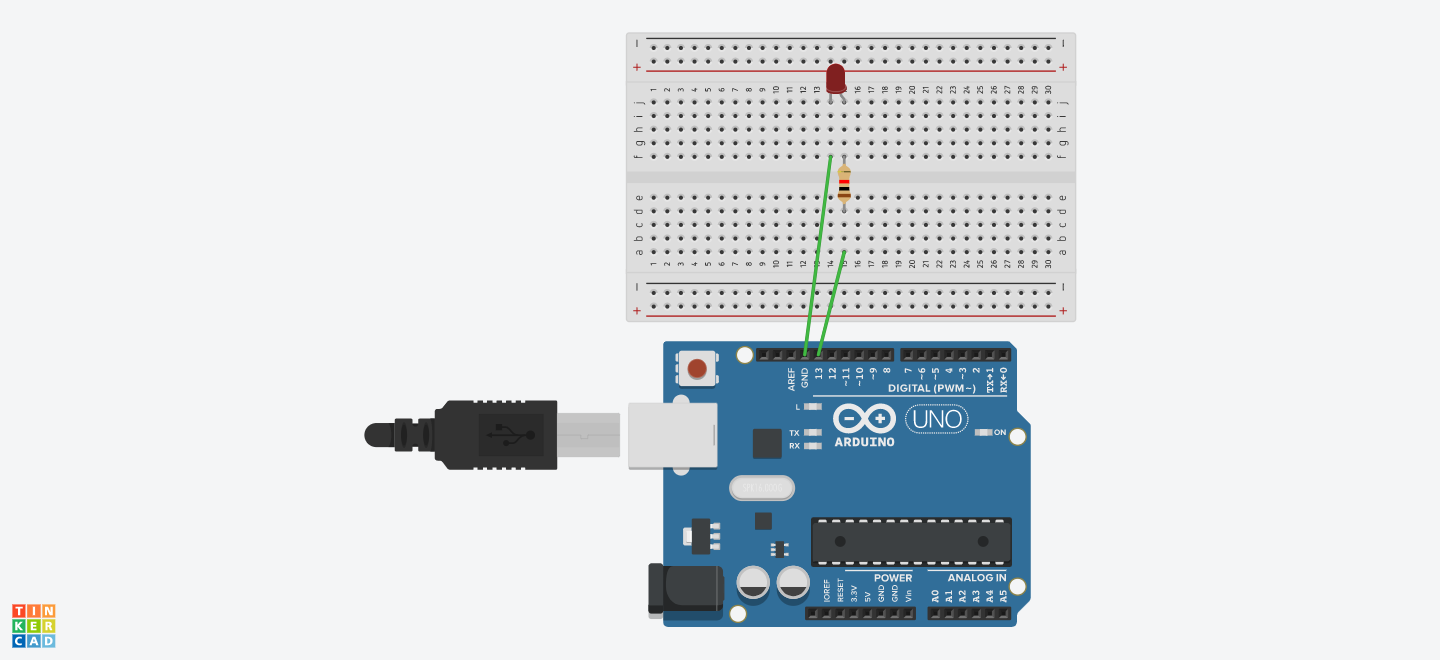
MATERIALES
1 LED
1 RESISTENCIA 1 KΩ
1 ARDUINO UNO R3
JUMPERS
CÓDIGO
void setup()
{
pinMode(13, OUTPUT);
}void loop()
{
digitalWrite(13, HIGH);
delay(1000);
digitalWrite(13, LOW);
delay(1000);
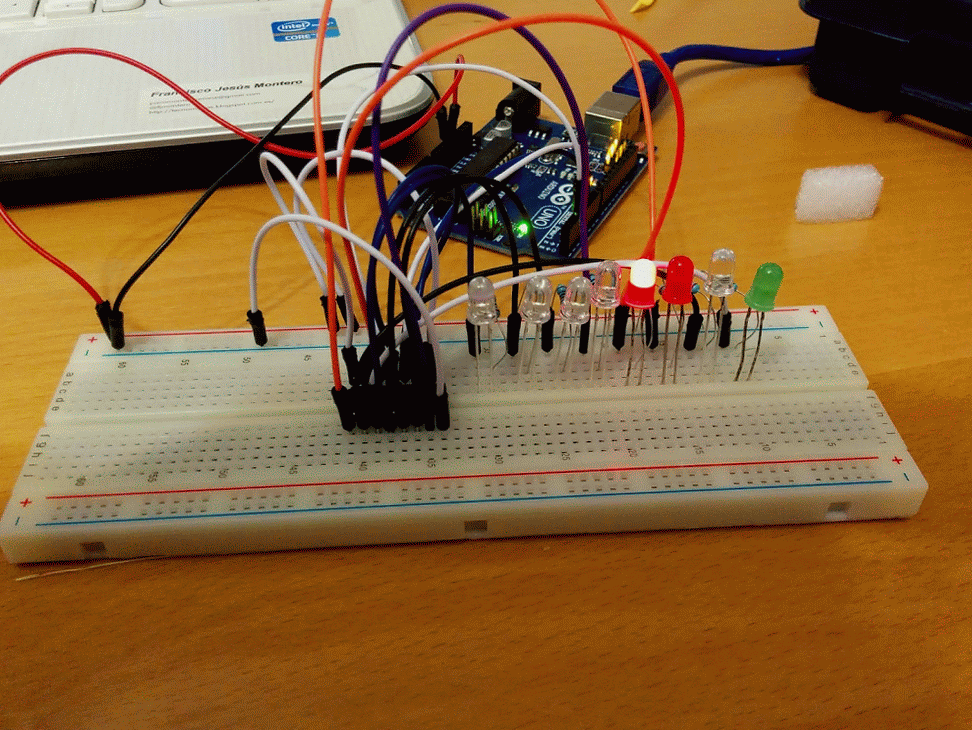
}BLINK PARPADEO DE DOS LED
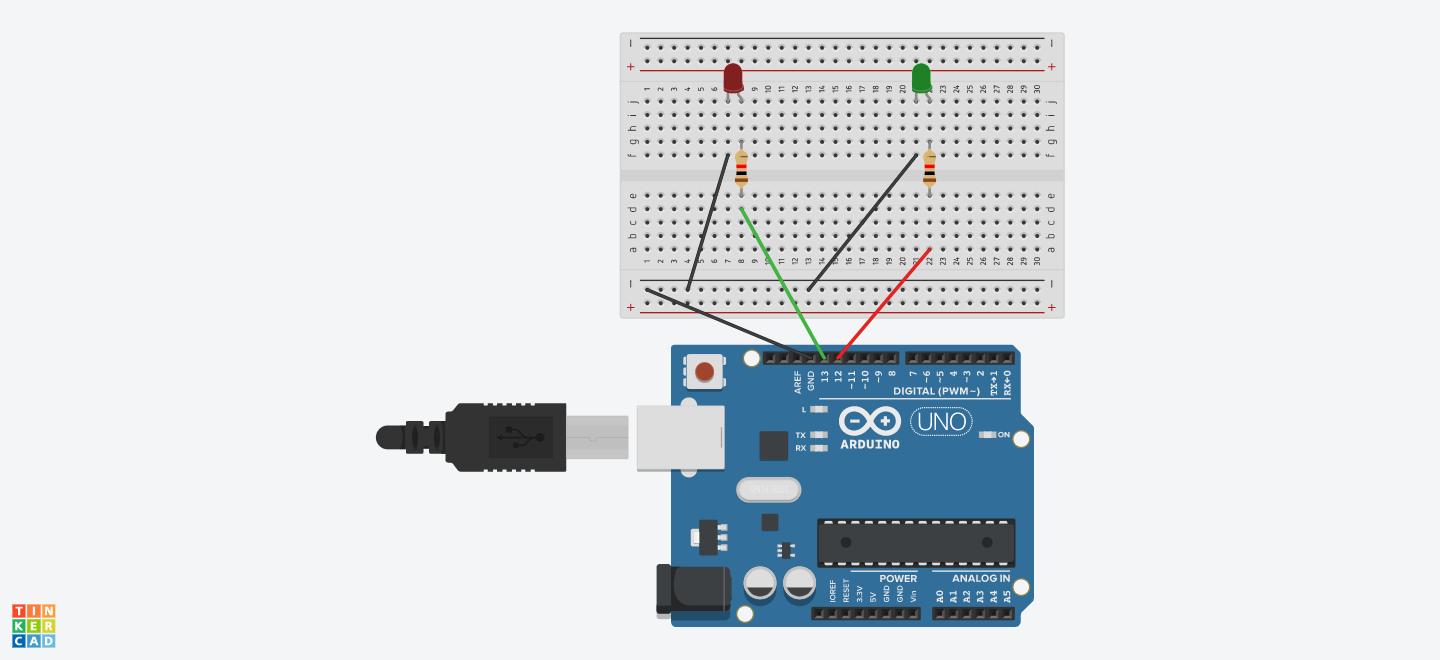
MATERIALES
2 LED
2 RESISTENCIA 1 KΩ
1 ARDUINO UNO R3
JUMPERS
CÓDIGO
void setup()
{
pinMode(13, OUTPUT);pinMode(12, OUTPUT);
}void loop()
{
digitalWrite(13, HIGH);digitalWrite(12, LOW);
delay(1000);
digitalWrite(13, LOW);digitalWrite(12, HIGH);
delay(1000);
} -
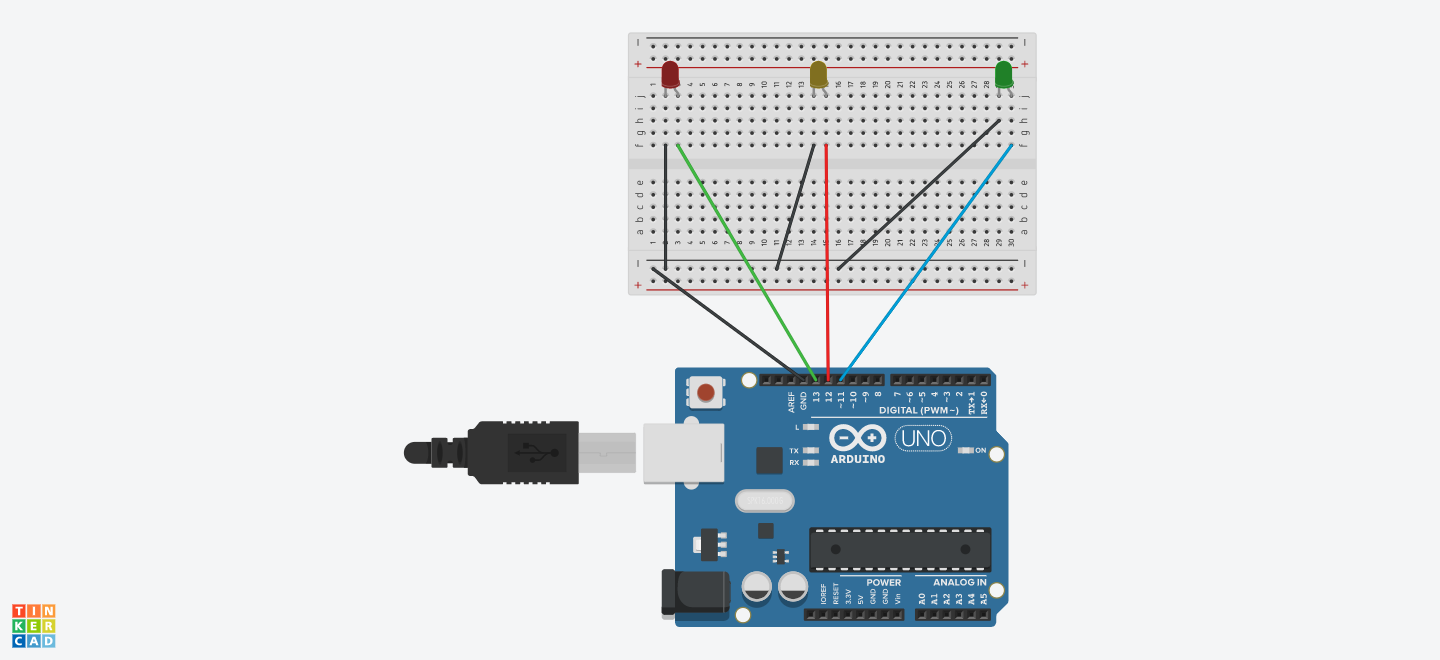
BLINK PARPADEO DE TRES LEDS SEMAFORO
CÓDIGO
void setup()
{
pinMode(13, OUTPUT);
pinMode(12, OUTPUT);
pinMode(11, OUTPUT);
}void loop()
{
digitalWrite(13, HIGH);
digitalWrite(12, LOW);
digitalWrite(11, LOW);
delay(3000);
digitalWrite(13, LOW);
digitalWrite(12, HIGH);
digitalWrite(11, LOW);
delay(3000);
digitalWrite(13, LOW);
digitalWrite(12, LOW);
digitalWrite(11, HIGH);
delay(3000);
}
-
-
-
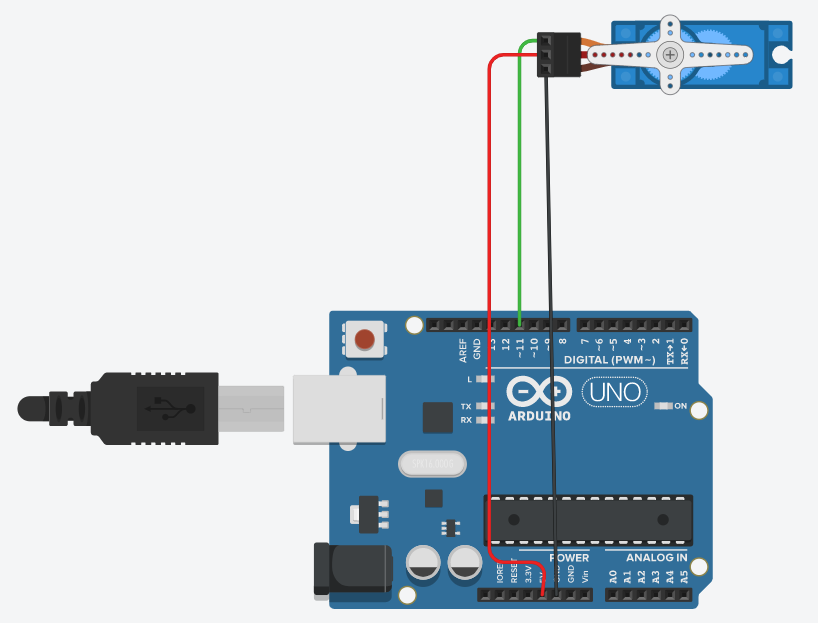
MATERIALES
1 MICRO SERVO MOTOR
1 ARDUINO UNO R3
JUMPERS
CÓDIGO
#include <Servo.h>
Servo servo;void setup(){
servo.attach(11);
}void loop(){
servo.write(0);
delay(1000);
servo.write(120);
delay(1000);
}
-
-
-
-
-
CIRCUITO
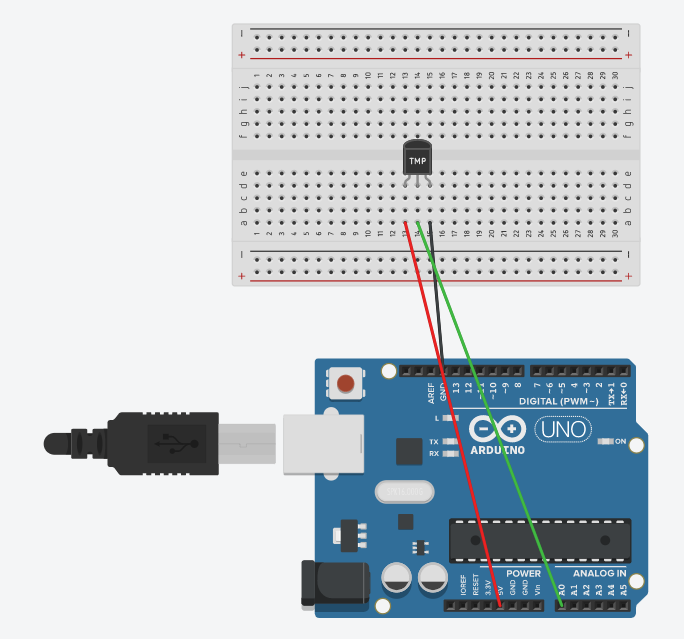
MATERIALES
- Temperature Sensor [TMP36]
- Arduino Uno R3
CÓDIGO ESCALA CELSIUS:
void setup()
{
Serial.begin(9000);
pinMode(A0,INPUT );
}void loop()
{
int temp=analogRead(A0);
temp = (5.0 * temp *100)/1024.0 -50;
Serial.println(temp);
}CÓDIGO ESCALA CELSIUS Y FAHRENHEIT:
void setup()
{
Serial.begin(9000);
pinMode(A0,INPUT );
}void loop()
{
float temp=analogRead(A0);
temp = (5.0 * temp *100)/1024.0 -50;float temp1=1.8*temp+32;
Serial.println(temp);
}CÓDIGO ESCALA CELSIUS Y KELVIN:
void setup()
{
Serial.begin(9000);
pinMode(A0,INPUT );
}void loop()
{
float temp=analogRead(A0);
temp = (5.0 * temp *100)/1024.0 -50;float temp1=1.0*temp+273;
Serial.println(temp);
}
-
-
-
CIRCUITO
MATERIALES
1 Arduino Uno R3
1 Sensor de Temperatura TMP 36
1 Led
CÓDIGO
void setup()
{
Serial.begin(9000);
pinMode(A0,INPUT );
pinMode(13,OUTPUT);
}void loop()
{
float temp=analogRead(A0);
temp = (5.0 * temp *100)/1024.0 -50;
if(temp>=38){digitalWrite(13,HIGH);}
else{digitalWrite(13,LOW);}
Serial.println(temp);
delay(3000);
}
-
-
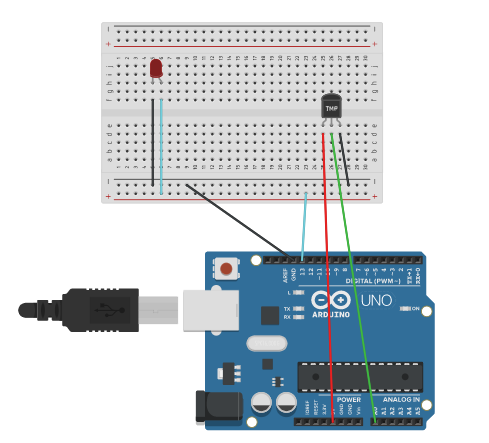
CIRCUITO

MATERIALES
- 1 Arduino Uno R3
- 1 Temperature Sensor [TMP36]
- 1 Sensor Piezo (buzzer)
CÓDIGO
void setup()
{
Serial.begin(9000);
pinMode(A0,INPUT );}
void loop()
{
float temp=analogRead(A0);
temp = (5.0 * temp *100)/1024.0 -50;
if(temp>=38){tone(9,4000);}
else{noTone(9);}Serial.println(temp);
delay(1000);
}
-
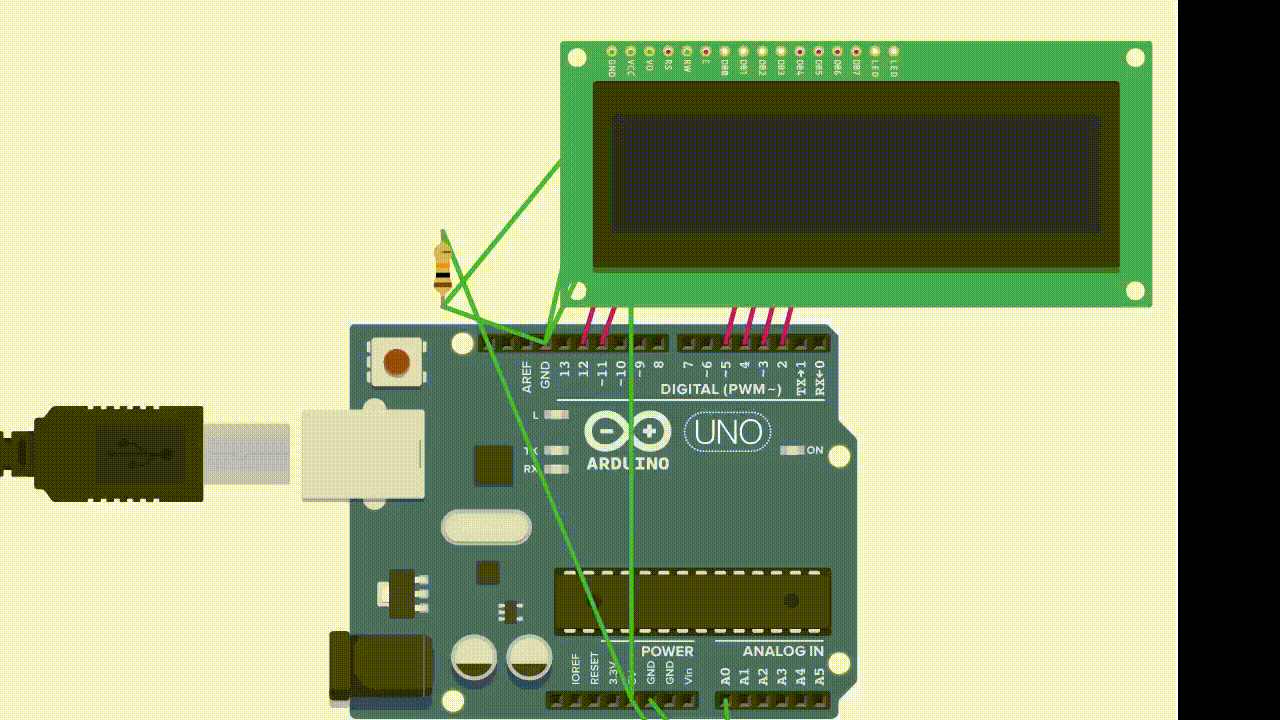
CIRCUITO
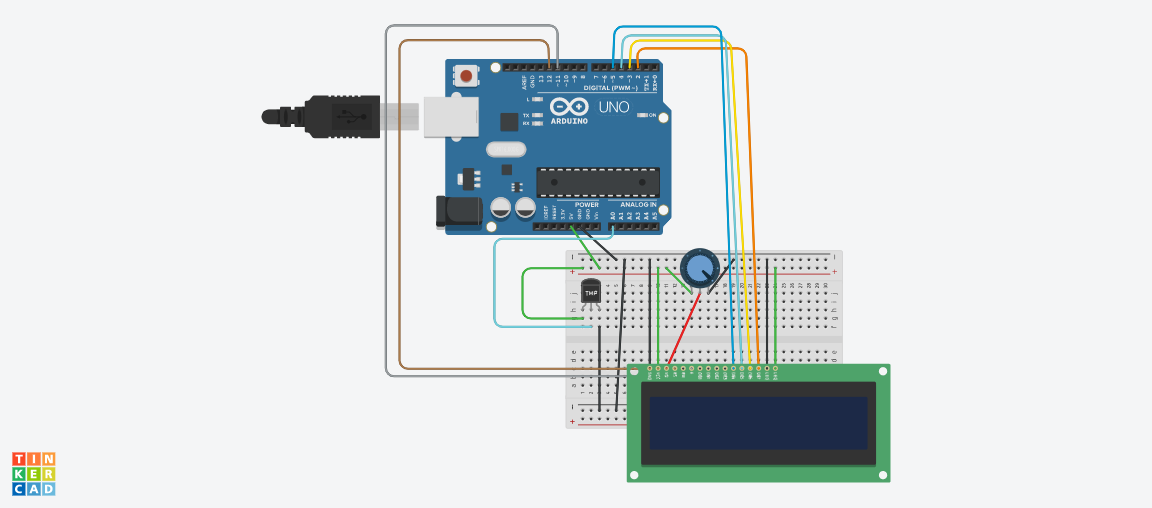
MATERIALES
1 Sensor de Temperatura TMP 36
1 LCD 16 x 2
1 Arduino Uno R3
1 Potentiometer, 1 kΩ
CÓDIGO
#include <LiquidCrystal.h>
LiquidCrystal lcd(12, 11, 5, 4, 3, 2);void setup()
{
lcd.begin(16,2);
lcd.home();
lcd.print("Temperatura");}
void loop()
{
float temp=analogRead(A0);
temp=temp*500.00/1024-50;
float temp1=1.8*temp+32;
delay(1000);
lcd.setCursor (0,1);
lcd.print("C=");
lcd.print(temp);
lcd.print(" F=");
lcd.print(temp1);}
-
CIRCUITO
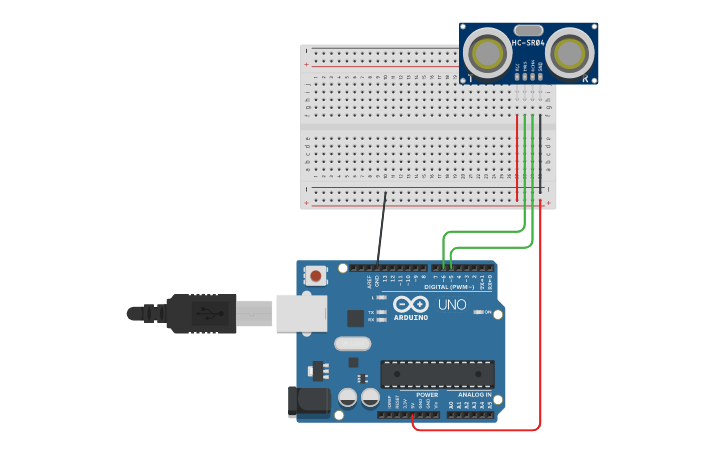
MATERIALES
1 Arduino R3
1 Ultrasonic Distance Sensor
CÓDIGO
void setup()
{
Serial.begin(9600);
pinMode(6,OUTPUT);
pinMode(5,INPUT);
}
void loop()
{
int distancia, tiempo;
digitalWrite(6,HIGH);
delayMicroseconds(500);
digitalWrite(6,LOW);
tiempo=pulseIn(5, HIGH);
distancia= int(tiempo/58);
Serial.println(distancia);
}
-
PROYECTO N° 1:
Armar un circuito Arduino con 3 ampolletas Led, con su correspondiente resistencia. Con las siguientes características:
- Los colores de los Led tienen que ser los de la bandera de Chile.
- La ampolleta del centro debe ser la roja, a su izquierda se coloca la azul, y a la derecha de las ampolletas led debe ir la blanca.
- El modo de las ampolletas debe ser blink, parpadeo. La luz roja debe estar encendida 5 segundos, la blanca 2 segundos y la azul 3 segundos.
PROYECTO N° 2:
Hacer funcionar un motor servo con Arduino, con las siguientes características:
- Ángulo inicial (servo.write): 30
- Ángulo final (servo.write): 150
- Tiempo en posición inicial (delay): 3 segundos
- Tiempo en posición final (delay): 5 segundos
-